Stalin Digital Archive
Yale University Press
  • Search
  • Browse
  • My SDA
    • Private Groups
    • Personal Folders
    • Private Group Folders
  • Resources
    • Stalin Digital Archive
    • User Guide
    • FAQ
    • Editor Projects
    • Private Group Tutorials
    • Institutions & Associations
    • Further Reading
  • About SDA
    • Overview & Donors
    • Collections
    • Editorial Board
    • Transliteration Policy
    • Publishers
    • News & Updates
RegisterLog In
Select documents to open Close
CancelOk

Login Required

A personal account is required to access tags, annotations, bookmarks, and all of the other features associated with the MySDA.

Username: (email address)
Password:
Forgot password?
Log In
  • Purchase a subscription
  • Renew your subscription
  • Need help? Contact us
Not registered?
Register for your MySDA account
Login
Cancel

Your subscription has expired.

Click here to renew your subscription

Once your subscription is renewed, you will receive a new activation code that must be entered before you can log in again

Close

Resources
Stalin Digital Archive
User Guide
FAQ
Editor Projects
Private Group Tutorials
Institutions & Associations
Further Reading
Stalin Digital Archive User Guide

1.0 What does the Stalin Digital Archive contain?
    1.1 RGASPI Materials (Bibliographic Records, Scanned Page Images)
        1.1.1 Fond
        1.1.2 Opis
        1.1.3 Delo
        1.1.4 Document
    1.2 Annals of Communism Materials
        1.2.1 Annals of Communism Volumes
        1.2.2 Annals of Communism Documents
2.0 Accessing the Archive
    2.1 Logging in with an institutional subscription
3.0 What can I do in this archive?
    3.1 Search Content
        3.1.1 Performing a Search
        3.1.2 Boolean search
        3.1.3 Wild card search
        3.1.4 Failed keyword search
        3.1.5 Working with Search Results
    3.2 Browse
    3.3 Document Viewer
        3.3.1 Document Viewer Toolbar
          3.3.2 Image Viewer Panel
        3.3.3 Text Viewer Panel
        3.3.4 Document Info Panel
4.0 MySDA
    4.1 MySDA Home
    4.2 Notifications
    4.3 Private Groups
        4.3.1 Joining a Private Group
        4.3.2 Creating a New Private Group
    4.4 Library
        4.4.1 Saving a document
        4.4.2 Managing and Sharing Documents in the MySDA Library
    4.5 Community Pages
        4.5.1 My Profile
        4.5.3 Private Groups
    4.6 My Annotations
    4.7 My Tags  

1.0 What does this archive contain?

1.1 RGASPI Materials (Bibliographic Records, Scanned Page Images)

The Stalin Digital Archive (SDA) consists primarily of scanned page images and corresponding bibliographic records written in Russian created by the Russian State Archive of Social and Political History (RGASPI). The primary source material represented by these images and records include documents relating to Joseph Stalin’s personal biography, his work in government, and his conduct of foreign affairs. RGASPI’s method of organizing this material in the physical archive is a hierarchical system of nesting folders, and this structure has informed both the selection of material for the SDA and its ultimate presentation. To understand this archive’s content and organization, it is therefore necessary to review the physical archive’s organizational system.

1.1.1 Fond

The fond is the highest-level organizational structure in RGASPI’s physical collection. Functionally, each fond is like a filing cabinet that contains several drawers filled with folders. Within RGASPI’s collection, Fond 558 is the “filing cabinet” dedicated to materials about Joseph Stalin; it contains approximately 40,000 unique documents. Yale University Press (YUP) and RGASPI have chosen to include only selected documents from this section of the physical archive, for a total of approximately 29,000 unique documents comprising 300,000 scanned page

1.1.2 Opis

Each fond in RGASPI’s collection contains a number of opisi, the functional equivalent of a filing cabinet’s drawers (to extend the analogy introduced above). Each opis in Fond 558 organizes the materials about Joseph Stalin based on content, chronology, or some combination of those two categories. YUP and RGASPI have chosen to concentrate on making available a subset of opisi in Fond 558 containing the most noteworthy documents. These opisi are:

  • Opis 1: Documents written by Stalin from 1889-1952.
  • Opis 2: Documents written by Stalin from 1911-1944.
  • Opis 3: Over 300 books from Stalin's personal library with his marginalia.
  • Opis 4: Stalin's biographical materials.
  • Opis 11: Stalin's correspondence and documents. This Opis covers the period from 1917 to 1952.
The SDA contains a complete set of bibliographic records and scanned images for these opisi, exclusing only materials classified by the Russian state government.

1.1.3 Delo

Extending the analogy introduced above, each delo corresponds to an individual folder within the filing cabinet’s (fond’s) drawers (opisi). As is true of all folders in general, some dela contain loose pages with no further organizing structure and some contain pages collected into discrete documents. This structure has been carried over from RGASPI’s organizational structure into the SDA, just like the fond and opisi divisions; the editors have included all declassified dela contained in the five opisi from Fond 558 listed above.

1.1.4 Document

As mentioned above, some dela contain loose pages with no further organizing structure while others contain pages collected into discrete documents. When a delo falls into the latter category, the SDA’s editors have preserved the distinction between individual documents present in RGASPI’s organizational structure. The SDA contains all declassified documents within dela located inside those five opisi from Fond 558.


1.2 Annals of Communism Materials

Yale University Press is supplementing the primary source materials provided by RGASPI with digitized volumes from its acclaimed Annals of Communism (AOC) series. Unlike the content from RGASPI, the AOC material does not include scanned page images. Instead, it includes the full text of the original print publication, including the English translations of primary source documents.

1.2.1 Annals of Communism Volumes

YUP has digitized the twenty-five volumes of the AOC series, which combines translations of primary source material from a variety of archival sources with editorial commentary. A majority of these books include material about Joseph Stalin while a few others deal instead with Russian and Soviet history more broadly. These volumes are best seen as a supplement to the archival material from RGASPI, providing additional content from other archival sources along with some context via the author’s explanatory text.

1.2.2 Annals of Communism Documents

While all primary documents in the AOC series appear within their respective volume transcriptions, YUP has also included these materials as standalone documents to augment discoverability. (NOTE: All of these documents exist in translation.) For example, users can find a 1942 letter from Molotov to Stalin that appears in an AOC volume via a bibliographic record indicating that specific document’s author (Molotov), recipient (Stalin), and date (1942) outside of its context within an existing AOC volume.

2.0 Accessing the Archive

The SDA is accessible via institutional subscription. The Search, Browse, and Resource pages are available to all users who visit the site. However, users must have an institutional subscription to access the Document Viewer and MySDA sections of the site.

A user with an institutional subscription can open documents in the document viewer; print/download documents from the document viewer; and export citation from the document viewer. However, that user must log in to her personal MySDA account before she can access the suite of tools related to user-generated content. These include bookmarks, tags, annotations, and the ability to save documents to personal, or private group folders.

2.1 Logging in with an institutional subscription

If a user belongs to an institution that subscribes to the SDA, then she will have automatic access to the archive as long as she is logged in to the subscribing institution’s network. When a user at a subscribing institution goes to the SDA website (www.stalindigitalarchive.com), she will see the text “Access provided by [Institution Name]” written in the center of the header (See the images below for examples of this text).

Institutional Access
Institutional Access Detail

Figure 1: SDA Header with Institutional Access - Detail

If you are sure that your institution has purchased access and you still do not see this access message, please log in to your institutional Virtual Private Network (VPN) or relocate to another computer within your institution's network.

If you would like to request institutional trial access to the site, please send an email to support@stalindigitalarchive.com or fill out the Information Request form at http://yalepress.yale.edu/sda.

In addition to the “Access” text, a user with an institutional subscription will see a “Log In” link and a “Register” link in the top right corner of the screen. First time users must create a profile before they are able to log in and access the MySDA functionality. To create a new SDA account:

1. Click the “Register” link in the top right corner of the screen. 2. Fill out the required fields in the resulting “Create a New Profile” page (Figure 2). 3. Click on the “Save and Continue” button at the bottom of the screen. 4. An automated email with a username, password, and a link for a one-time login will be sent to the user’s email address. Open this email and click on the one-time login link. 5. Reset the password, and fill out any other relevant profile information.


Create Profile Page

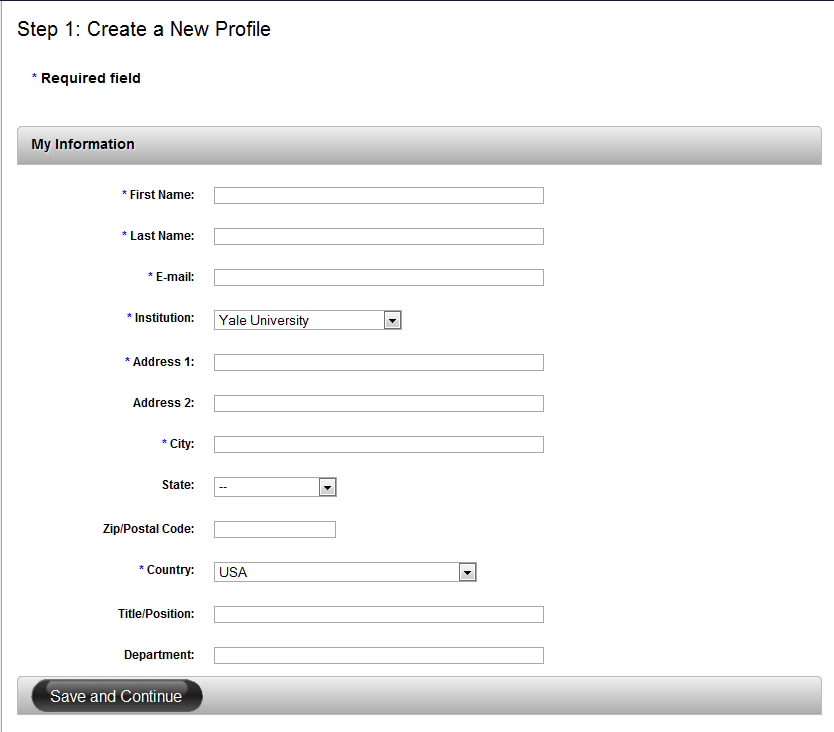
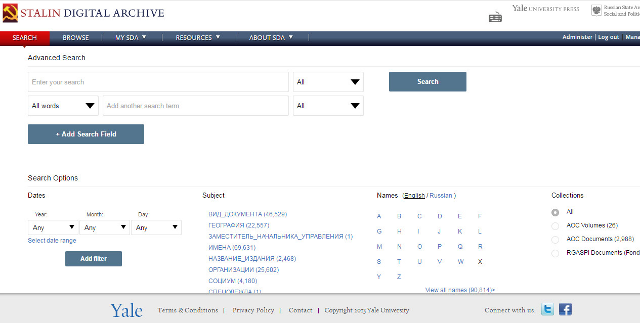
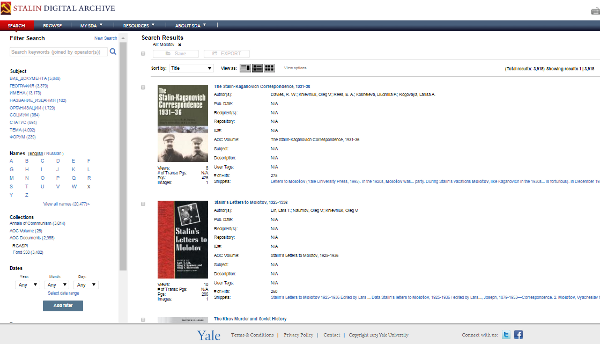
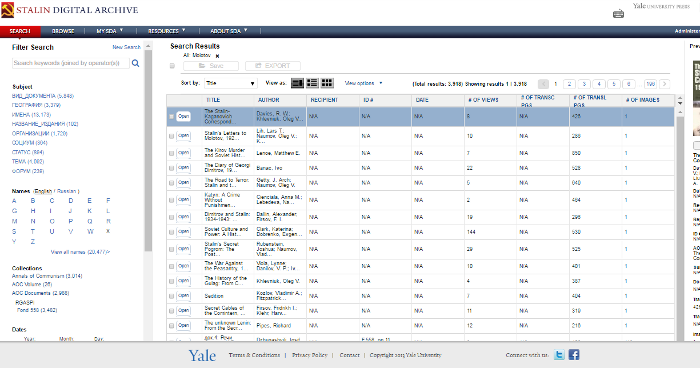
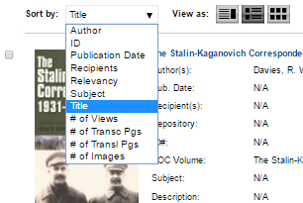
Figure 2: “Create a New Profile” page

After creating a valid MySDA profile, a user can log in to the SDA at any time, as long as she is within the network of a subscribing institution.

3.0 What can I do in this archive?

3.1 Search Content

The SDA’s search tool allows for a simple keyword search of all archival content, as well as a more refined search based on specific bibliographic constraints.

3.1.1 Performing a Search

The search page is accessible via the Search tab in the top navigation bar. When a user navigates to the search page, the user is directed to the Advanced Search landing page. To add search fields, click the “+Add Search Field” button. You can also choose to limit this search to specific fields of information, like author names or titles, or employ Boolean search operators by opening dropdown menus adjacent to each search field. The Boolean search tool allows you to search the database with such operators as & (AND), | (OR), and ! (NOT). For an introduction to the Boolean operators used on the SDA site, see http://sphinxsearch.com/docs/current.html#boolean-syntax. Some additional helpful resources for Boolean search can be found at http://libguides.mit.edu/content.php?pid=36863&sid=271372 and http://library.duke.edu/services/instruction/libraryguide/advsearch.html.

Search in

Figure 3: Advanced Search Landing

A list of the possible search refinement options (accessible through the dropdown menus to the right of the text boxes) and their definitions follow:

All: The search term can appear in any context (unconstrained).

Annotations: The search term can only appear in user-generated annotations associated with a document. The search term can also include user names associated with annotations.

Authors: The search term can only appear in a document author’s name.

ID#: The search term can only appear in a document’s archival identification number.


NOTE: Users should employ the following format when searching for a specific document by archival identification number, paying special attention to add a single space after each comma:

f.558, op.11, d.1, doc.1

Please note that the search tool is not case-sensitive.


Publication dates: The search term can only appear in a document’s publication date.

Recipients: The search term can only appear in a document recipient’s name.

Subjects: The search term can only appear in a document’s subject designations.

Tags: The search term can only appear in user-generated tags associated with a document.

Text: The search term can only appear in a document’s full-text transcription or translation, if available.

Titles:The search term can only appear in a document’s title.

Please note that all searches are language-specific, except for author and recipient searches (i.e., searches constrained to author and recipient fields will return both English and Russian matches regardless of the language of the search term.).

Users can also add filters to further constrain search results with the options available below Search Options (Figure 4).

 Search Filter Options

Figure 4: Search Options


A list of possible search filters and their definitions follow:

Collections: Filters results to specific collections in the SDA. These include: titles in the YUP’s Annals of Communism series; translated primary documents contained in the Annals of Communism series; and RGASPI’s primary documents. Users can further constrain RGASPI documents by fond, opis, and delo.

Keyword: Adds additional keywords to the search parameters.

Names: Filters results using names of document authors and recipients. The list of names contained within the archive has been alphabetized in both Russian and English.

Date: Filters results by specific date or date range.

Subject: Limit results to documents within a limited list of subjects

After entering all desired constraints to the search parameters, click on the “Search” button to conduct the search.

Users may also conduct a basic keyword search from all other pages of the SDA platform, including the home page, via the basic keyword search box located in the top right corner of the screen (Figures 4). Simply enter your search term and click on the magnifying lens at the right of the box.

Basic Keyword Search

Figure 5: Basic keyword search box

Finally, users can perform searches in Russian via a Cyrillic alphabet keyboard available in the header of each page on the platform (Figure 6). This virtual keyboard allows users to type in Cyrillic in any text field on the site. To begin typing in Cyrillic, 1) click on the keyboard icon in the header; 2) position your cursor in the necessary text field; then 3) use your mouse to click on the symbols in the virtual keyboard or start typing with your own keyboard.

Virtual Keyboard

Figure 6: Cyrillic alphabet keyboard

3.1.2 Boolean search

Users can employ Boolean search operators by selecting the Boolean Search option in the dropdown menu to the left of keyword search boxes on the Advanced Search landing page. The Boolean search tool allows you to search the database with such operators as:

  • & (AND). Entering the search query Hello & World will bring up all search results that contain both the word "Hello" and the word "World". The AND operator is the default operator, so typing Hello World into the search box will produce the same result.
  • | (OR). Entering the search query Hello | World will bring up all documents that contain either the word Hello or the word World.
  • ! (NOT). Entering the search query Hello !World or Hello -World will bring up all documents that contain the word Hello and do not contain the world World.
  • MAYBE. Entering the search query Hello MAYBE World will bring up all documents that contain the word Hello and all documents that contain the words Hello and World.
  • @! (Ignore Field Search Operator). Entering the search query @!title Hello World will ignore all documents that contain the words Hello and World in the Title field.
  • ~ (Proximity Search Operator). Entering the search query "Hello World"~10 will bring up all documents that contain the words Hello and World within ten characters of each other.

For more resources related to the Boolean operators used on the SDA site, see http://sphinxsearch.com/docs/current.html#boolean-syntax. Some additional helpful resources for Boolean search can be found at http://libguides.mit.edu/content.php?pid=36863&sid=271372 and http://library.duke.edu/services/instruction/libraryguide/advsearch.html.

3.1.3 Wild card search

Users can conduct searches with the wildcard *. The * functions as an auto-complete for a given keyword. For example, a search for “sta*” will search the database for all words that begin with "sta".

3.1.4 Failed keyword search

If your keyword search does not yield any results, the archive’s search engine will provide 5 terms that do exist within the archive’s database and that are alphabetically similar to your initial query. This list of 5 words will change depending on what you are looking for. Clicking on one of these terms will conduct a keyword search of the archive’s contents.

3.1.5 Working with Search Results

After conducting a search, the center panel of the screen will populate with the document results list. This search results panel will provide basic bibliographic information about each individual search result, including title, author, recipient, ID#, etc. A navigation tool in the top panel of the screen will indicate how many documents have been found and how many pages are in the list (Figure 7).

Detail View

Figure 7: Detail View of search results

Users can adjust the view of the search results list by toggling between the three “View As” buttons, located in the top panel. The three view options are List View, Detail View, and Thumbnail View.

The default view for the search results panel is Detail View which displays both the thumbnail image and all of the bibliographic metadata for each document in the results list. Clicking on the hyperlinked tags or subjects will conduct a search that uses the selected item as the primary search constraint.

List View displays the results in documents appearing in a sortable grid, with each piece of bibliographic information appearing in a separate column. Users can customize which bibliographic fields appear in the grid by selecting the View Options menu above the results list (Figure 8).

Search Results

Figure 8: List View of search results

These view options include:

Avg. Rating: The average rating (from 1 to 5 stars) of a given document. Each user on the site can rate a document. This rating reflects a document’s scholarly value and/or interest to the SDA community.

Author: Author(s) of a given document.

Date: Publication date of a given document.

ID#: Repository ID# given document, indicating a document’s location within RGASPI’s holdings.

Recipient: Recipient(s) of a given document.

Snippets: The first three instances in which a given keyword appears in a document’s text and/or public annotations. Snippets will appear only after a user has conducted a keyword search. Clicking on these hyperlinked snippets will open the document in the viewer, and will autoadvance the user to the exact location of the given snippet in the text and/or annotations.

# of Hits: The number of times a given keyword appears in a document’s text and/or public annotations.

Subject: The subject classification of a given document, as determined by the SDA Editorial Board.

Title: The title of a given document.

# of Views: The total number of times a given document has been viewed by members of the SDA community.

# of Transc Pgs: The number of transcription pages associated with a given document.

# of Transl Pgs: The number of translation pages associated with a given document.

# of Images: The number of images associated with a given document.

View Options

Figure 9: View Options menu

Thumbnail View displays the thumbnail image and a limited amount of bibliographic data for each document in the results list (Figure 10). Click on “More Info” beneath a document’s thumbnail image for a more detailed presentation of the document’s bibliographic information.

Thumbnail View

Figure 10: Thumbnail View of search results

Users can re-sort the results list in any view by using the “Sort by” drop-down menu (Figure 11). In List View, users can also sort the results alphabetically or reverse-alphabetically in both English and Russian by clicking on the header of any column.The sorting options include:

Avg. Rating, Author, Date, ID#, Recipient, Snippets, # of Hits, Subject, Title, # of Views, # of Transc Pgs, # of Transl Pgs, and # of Images

Sort Options

Figure 11: "Sort by" drop down menu

Open a document by clicking the “Open” button (which appears in both the search results list and in the right-hand preview panel) in List View; by clicking on the thumbnail image or the title of the document in Detail View; or by clicking on the thumbnail image, title of the document, or the “Open” button within the More Info panel of the Thumbnail View.

Users can generate academic citations for search results by using the “Export Citation/Results” button in the top panel (Figure 12). Simply check the box to the left of the desired title(s) andclick on “Export Citation.” The Citation Type options are APA, Chicago, MLA, and Turabian. The Export options are Print to Screen, Export to Endnote, and Export to txt.

Users can also export the all of the bibliographic information for a set of search results to a CSV file by selecting the “Export Citation/Results” button in the top panel (Figure 12). Users can export bibliographic information for a maximum of 3,000 search results items at a time. If the search results list exceeds 3,000 items, please use the search filters to refine the list to a smaller number. Please note that the “Export Results” tool exports all of the items in a search results list by default, as long as the list is under 3,000 items.

Finally, users can save one or more documents to a personal or private group folder by selecting the checkboxes next to the desired documents and clicking on the “Save” button in the top panel. Please note that a user must be logged in to her MySDA account to be able to save documents to folders.

Save and Export Citations

Figure 12: Export Citation/Results button


3.2 Browse

The Browse page allows users to explore the site’s contents by categories reflecting bibliographic information about documents, or by information about how site users are working with documents. The Browse function is analogous to browsing the stacks of a library, while the Search function is analogous to looking for a specific book in a card catalogue.

Navigate to the Browse page by clicking the Browse tab below the site banner. The center panel displays the 50 most-viewed documents by default. A list of browsing categories appears in the left-hand panel (Figure 13).

Browse

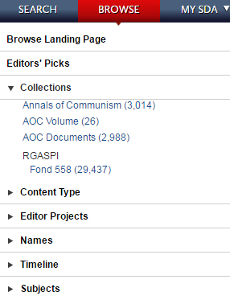
Figure 13: Browse options

The browsing categories are:
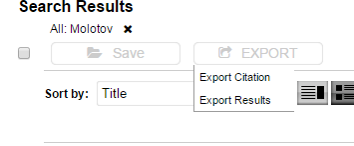
Most-Viewed: Provides a list of the SDA’s most viewed documents.

Most-Searched Terms: Provides a list of the SDA’s most searched terms.

Popular Tags: Provides a list of popular tags based on usage statistics. Selecting one of these tags will populate the center panel of the screen with the corresponding list of documents.

Editors’ Picks: Provides a list of documents selected by SDA editors. This list will be updated regularly to highlight new, important, newsworthy, or otherwise notable content.

Collections: Provides a list of documents based on specific collections in the SDA. These include: titles in the YUP’s Annals of Communism series; translated primary documents contained in the Annals of Communism series; and RGASPI’s primary documents. Users can further constrain RGASPI documents by fond, opis, and delo.

Content Type: Provides a list of documents that contain transcriptions and/or translations. Transcriptions are text-searchable documents in Cyrillic associated with corresponding images from the RGASPI collections; translations are text-searchable documents in English associated with the same subset content.

Editor Projects: Provides a list of documents organized thematically by projects identified by the SDA Editorial Board. Learn more about these projects on the Editor Projects page in the Resources section.

Names: Provides a list of documents based on names of document authors and recipients. The list of names contained within the archive has been alphabetized in both Russian and English.

Timeline: Provides a list of documents based on publication date within a given chronological era, as defined by the SDA Editorial Board.

Subjects: Provides a list of documents based on subject designation, as defined by the SDA Editorial Board. Currently, these subject designations are only in Russian.


3.3 Document Viewer

The Document Viewer displays the text and images that are associated with each document in the archive. This content is divided into three primary sections: the image viewer panel, the text viewer panel, and the document info panel (Figure 14).

Document Viewer

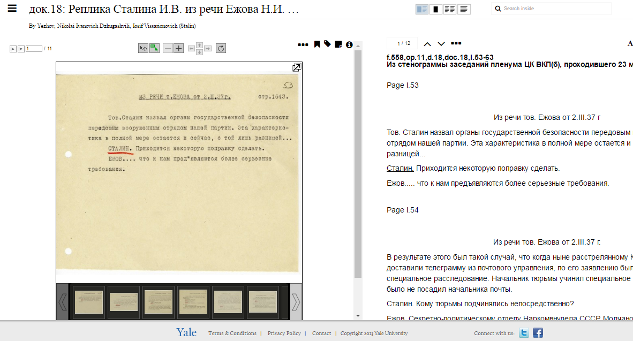
Figure 14: Document Viewer

Users can open documents in the Viewer via the Search, Browse, or MySDA sections of the site. In addition to displaying all bibliographic data and content associated with a document, the Viewer also allows users to customize documents with personal bookmarks and highlighting. It also enables users to review and add personal, private group, or public commentary in the form of tags and annotations.

Please note that a user must have institutional access to the SDA in order to be able to open a document in the Document Viewer. Furthermore, a user with institutional access must log in to her personal MySDA account to be able to access the highlighting, bookmark, tag, annotation, and save features available within the viewer.

3.3.1 Document Viewer Toolbar

The Document Viewer toolbar appears at the top of the screen and enables users to view and interact with documents in a number of ways. Users can save a document to a personal, or private group folder; download or print up to 10 pages at a time of a document’s images, transcription, or translation (as long as the document has sufficient print privileges); export a document’s academic citation in a range of formats; export all private group and/or public annotations associated with a document; and adjust the view setting to image only, text only, or image and text. If a particular document has both transcription and translation text, then a user can choose to view either or both. Users can turn the document info panel on or off via the “i” toggle on the right side of the toolbar.

Next to the title of the document, click the Table of Contents icon to open a list of the chapters that make up the document. Click on a chapter title to jump to any chapter in the volume.

Above the title of the document, click “back to search” to return to the search results page

Table of Contents

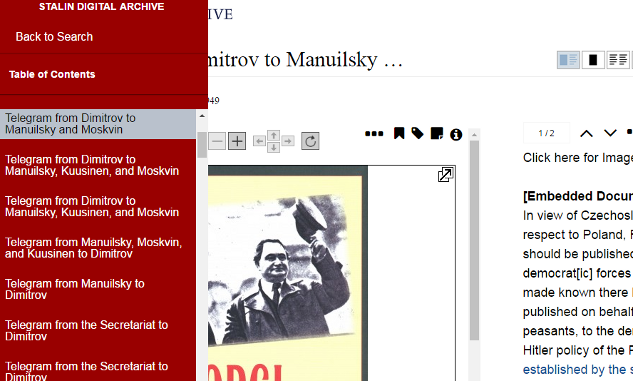
Figure 15: Table of Contents image

(Table of Contents image)

3.3.2 Image Viewer Panel

The image viewer panel displays images associated with an open document. This panel will be closed by default if the document does not contain any images. The buttons available on the image viewer panel toolbar (Figure 16) are:

Up/down arrows: Allows users to page backwards and forwards through documents with multiple images/pages.

Page Count: Shows the total number of images/pages contained within the document. Users can jump to a page by typing a page number into the text box.

Pan Button (arrow and compass): Allows users to pan around the image by clicking and dragging.

Zoom Rectangle Button (arrow and box): Allows users to zoom in on an image by drawing a rectangle over a particular section.

Plus/Minus Buttons: Allows users to zoom in and out of an image.

Up/Down/Right/Left Arrows: Allows users to pan around an image.

Reset Size Button: Resets an image to its original size.

Bookmark Button: Allows logged in users to create a personal bookmark referencing a specific image within a document.

Tag Button: Allows logged in users to create personal, private group, or public tags referencing a specific image within a document.

Annotation Button: Allows users to create personal, private group, or public annotations referencing a specific image within a document.

Expand Button: Allows users to view a document’s images in full-screen (Figure 17).

Horizontal Image Gallery: Allows users to scroll horizontally through a document’s images.

Image Viewer Toolbar

Figure 16: Image viewer panel toolbar

View of Full Screen Image

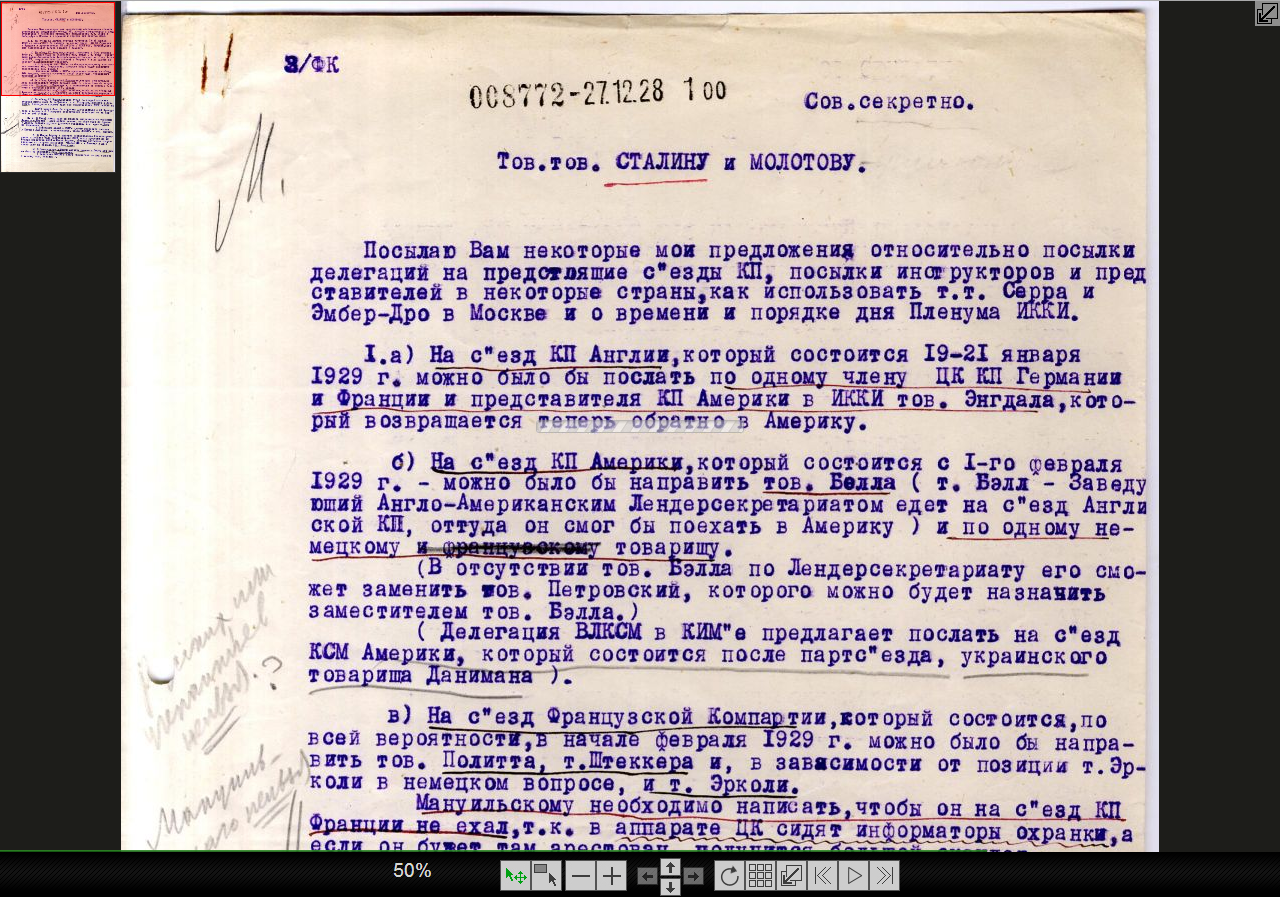
Figure 17:Image in full-screen mode

A modified image viewer toolbar appears when users view an image in full-screen (Figure 18). The full-screen toolbar features a pair of left and right buttons, which allow users to move between images, as well as a play button, which allows users to cycle through images as in a slideshow. The thumbnail button displays all the images in the documents in thumbnail view (Figure 19). Buttons on the left side of the toolbar allow users to pan around an image; zoom in on an image by drawing a rectangle over a particular section; or zoom in/out of an image by clicking on + or -. To bookmark, tag, or annotate an image, exit out of full screen mode by clicking on the appropriate button, and click on the bookmark, tag, or annotation button in the image viewer toolbar.

Full Screen Image Toolbar

Figure 18: Full-screen toolbar

Full Screen Image Thumbnails

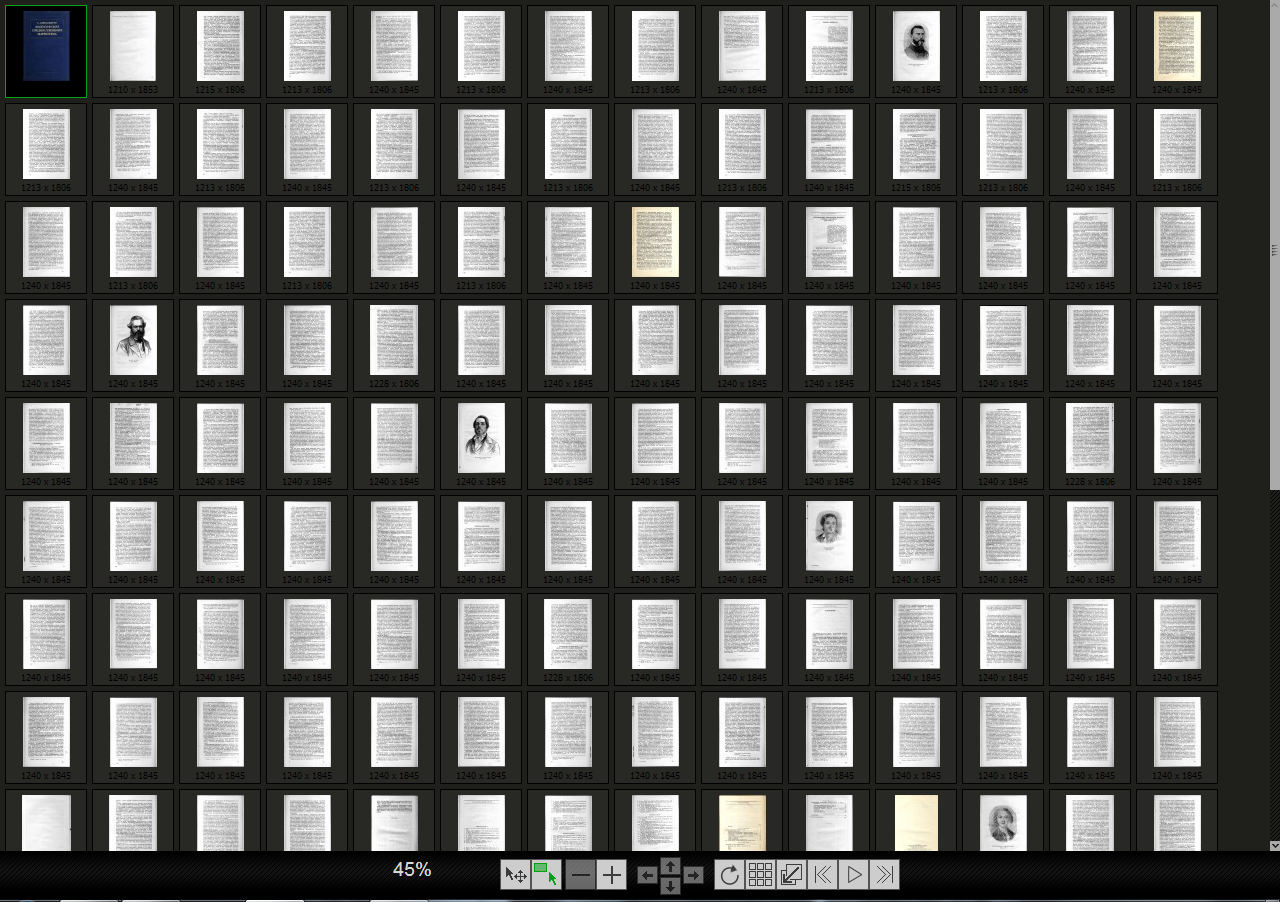
Figure 19: Thumbnail view of all images in a document (full-screen mode)

3.3.3 Text Viewer Panel

The text viewer panel displays the transcription and translation, when available, of an open document. If the document does not have a transcription and translation, then the text viewer panel will be closed by default. Please note that, in order to create a bookmark, tag, or annotation in the text viewer panel, logged in users must first select a portion of the text, and then click on the appropriate button. The buttons available on the Text Viewer Panel toolbar are:

Font Size Decrease Button: Decreases the size of the font in the text viewer.

Font Size Increase Button: Increases the size of the font in the text viewer.

Bookmark Button: Allows logged in users to create a private bookmark referencing a particular section of the text.

Tag Button: Allows logged in users to create personal, private group, or public tags referencing a particular section of the text.

Annotation Button: Allows logged in users to create personal, private group, or public annotations referencing a particular section of the text.

Highlight Button: Allows logged in users to highlight specific passages of the text. Users can remove highlighting by re-selecting a portion of the text that has been highlighted, and clicking on the “Highlight” button.

Page Count: Shows the total number of pages contained within the document. Users can jump to a page by typing a page number into the text box.

Show/Hide Icon: Allows logged in users to show or hide all user-generated content associated with a document.

Expand Button: Allows users to view a document’s text in full-screen (Figure 20).

Full Screen Text

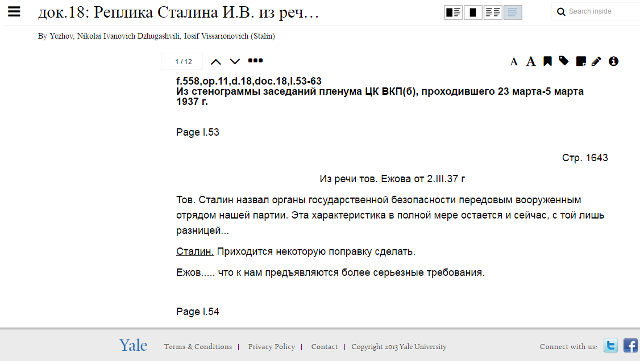
Figure 20: Document text in full-screen

3.3.4 Document Info Panel

The Document Info Panel displays all bibliographic information associated with an open document (Figure 21). It also permits users to review user-generated content such as tags, annotations, and bookmarks related to the open document.

Document Info Panel

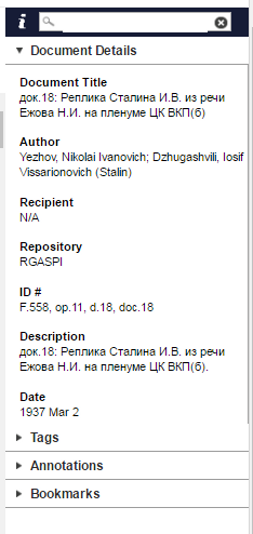
Figure 21: Document Info Panel

The different sections of the document info panel are:

Keyword Search Box: Allows users to conduct a full-text keyword search of an open document’s content, including text and annotations. Conduct a keyword search by entering a term into the textbox at the top of the document info panel.

Document Details: Displays a document’s bibliographic information, including title, author, date, archival ID number, etc.

Tags: Displays personal, private group, and public tags associated with an open document. Users can edit or delete their own personal, private group, or public tags, but they cannot edit or delete private group or public tags created by other users.

Annotations: Displays personal, private group, and public annotations associated with an open document. Users can edit or delete their own personal, private group, or public annotations, but they cannot edit or delete private group or public annotations created by other users. Users can also report inappropriate annotations to the SDA Administrator by clicking on the “Report” button.

NOTE: Certain annotations will contain a green “SDA Editor Approved” icon above their content. These annotations were either written or approved by one of the archive’s editorial board members.

Bookmarks: Displays personal and public bookmarks associated with an open document. Users can edit or delete their own personal bookmarks, but they cannot edit or delete public bookmarks created by the SDA Editorial staff. Users can share personal bookmarks by clicking on the “chain” icon and copying the accompanying URL. Please note that only SDA Editorial Board members can create public bookmarks.

NOTE: Clicking on any bookmark, tag or annotation in the document info panel will take the user directly to the relevant section of the document. Similarly, clicking on a bookmark, tag or annotation icon in a text’s margins will open that bookmark, tag or annotation in the document info panel.


4.0 MySDA

MySDA is the site’s center for personalized content and community interaction, and is accessible via the MySDA tab at the top of the screen.

4.1 MySDA Home

The MySDA homepage allows users to view notifications; access recently viewed documents; manage a personal library of saved documents, tags, annotations, and searches; and participate in Private Groups (Figure 22). See Section 2.1 for more information on how to create a MySDA account.

MySDA Homepage

Figure 22: MySDA homepage

4.2 Notifications

The Notifications area of MySDA displays updates from both administrators and fellow SDA members. Notifications cover such topics as additions to the digitized archive, and private group discussion threads; invitations to join new private groups; the addition of new documents to private group folders; site news and updates from the site admin; and other updates related to a user’s personal account and/or the general functionality of the site (Figure 23).Notifications are presented in a tabular view, and can be sorted by date or notification type (i.e. Forum, Group, Message).

Notifications Page

Figure 23: Notifications area of MySDA


4.3 Private Groups

Private Groups represent a more selective, focused and member-specific subset of the SDA’s community functionality. Anyone with a MySDA account can create a Private Group. The creator of a Private Group becomes that group’s owner by default, and thus has the ability to define the name and description of the group; invite other MySDA users to the group; manage the group’s folder permissions (i.e. Read/Write); remove users from the group; and designate a new owner of the group.

A list of all of the Private Groups to which a MySDA user has access is accessible by mousing over the MySDA tab at the top of the screen and clicking on “Private Groups” (Figure 24). This will indicate the name of each group; the number of members belonging to each group; the user’s group status (i.e. Invited, Member, Owner); the user’s group options (i.e. Accept Invitation, Decline Invitation, Leave Group, Remove Group); and the date on which the user was invited to the group.

Private Groups Page

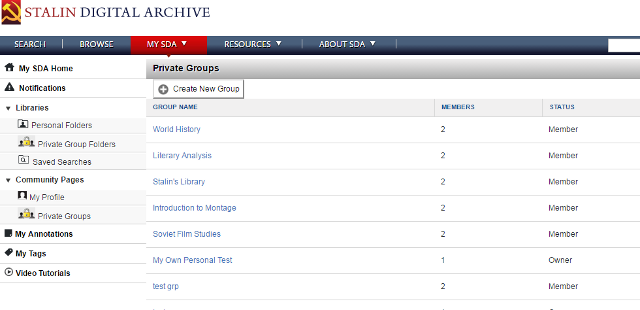
Figure 24: Private Groups area of MySDA

Each Private Group has a corresponding forum in which participating users can discuss relevant topics and documents. Users must joint a Private Group before they can participate in its forum.
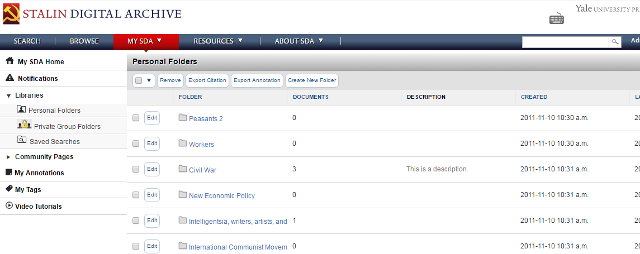
4.3.1 Joining a Private Group

A user must first receive an invitation before she can join a Private Group. To join a Private Group:

1. Click on the MySDA tab at the top of the screen. 2. Click on the Community Pages tab in the left-hand navigation panel. 3. Select “Private Groups.” 4. Click the “Accept” or “Decline” button in the Options column next to the group name to which the user has been invited.

NOTE: The user may also accept/decline a private group invitation via the Notifications page.

4.3.2 Creating a New Private Group

Any user can create a new Private Group. Once a user creates a Private Group she becomes the owner of the group. To create a new Private Group:

1. Click on the MySDA tab at the top of the screen. 2. Click on the Community Pages tab in the left-hand navigation panel. 3. Select “Private Groups.” 4. Click on the “Create New Group” button at the top of the Private Groups homepage. 5. Enter the group name and description. 6. Select the Member Folder Access.

NOTE: “Read Only” means that all non-owner members can only view documents in shared folders. “Read/Write” means that all non-owner members can add and remove documents from shared folders.

7. Enter the email addresses of the users whom you would like to invite to the group.

NOTE:You can only invite users with currently existing MySDA accounts to join Private Groups.

8. Click “Submit.”

NOTE: If a private group owner wants to leave a group, she must first designate a current group member as the new owner. The owner can do this by clicking on the “Edit” button on the Private Group’s homepage, and then by clicking on “Assign New Owner.”


4.4 Library

The MySDA Library enables users to save and share documents from within the archive. Personal Folders enable users to view and manage documents they have saved for their own personal research. Private Groups Folders allow users to share documents with other members of related Private Groups. To access the MySDA library, go to the MySDA homepage and click on the appropriate tab in the left-hand navigation panel.

4.4.1 Saving a document

Users can save a document to the MySDA library from the search page, browse page, or document viewer. To save a document from the search or browse page:

1. Go to the search or browse page, and select the checkboxes next to the appropriate documents. 2. Click on the “Save” button in the top toolbar. 3. Select an existing personal or private group folder to which to save the documents. Users can also save the documents to a new personal folder by using the “Create new folder” option. 4. Click the “Save” button at the bottom of the dialogue box.

To save a document from the Document Viewer:

1. Open a document in the Viewer and click the “Save” button in the document viewer toolbar. 2. Follow steps 3 and 4 as outlined above.

4.4.2 Managing and Sharing Documents in the MySDA Library

In the Library section of MySDA, users can create new folders, rename existing folders, create and edit folder descriptions, sort folders by various criteria, and delete individual folders (and the documents contained within).

Click on a personal or private group folder title to view the list of documents contained within (Figure 25). Clicking on the title of a document will open it in the viewer. Buttons at the top of the folder’s screen allow users to export academic citations or user-generated annotations on selected documents; copy or move documents from one folder to another; or remove a document from the current folder. Users can also adjust the view of the document list by using the View Options and “Sort by” drop-down menus on the right side of the screen.

NOTE: Users cannot copy, move, or delete documents contained in a private group folder. Users must have Read/Write access to copy, move or delete documents contained in a Private Group.

Library Folder

Figure 25: Library section of MySDA


4.5 Community Pages

Community Pages display information about individual users to the SDA community.

4.5.1 My Profile

The My Profile page displays a user’s public profile, and is accessible via the MySDA left-hand navigation panel. The My Profile page displays basic biographical information (e.g. name, email address, academic institution, “about me,” etc.) as well as site usage information (e.g. Public tags and annotations created by a user, etc...).

To edit the My Profile page:

1. Click the “Manage Profile” button in the top right-hand corner of the screen.

2. Click the Edit tab.

3. Update the relevant profile fields.

4. Click “Apply” at the bottom of the screen.

NOTE: Users can set their email address to public or private. When a user selects “private,” her email address is hidden from all other users on the site.

4.6.3 Private Groups

The Private Groups page shows a list of all of the user’s affiliated Private Groups. See section 4.4 to learn more about Private Groups.


4.6 My Annotations

Users can manage their personal, private group, and public annotations via the My Annotations tab, available via the MySDA left-hand navigation panel. This page allows users to sort annotations by document title, annotation type, or date created; export selected annotations to a text file or browser tab; edit annotations; and delete annotations (Figure 26).

My Annotations

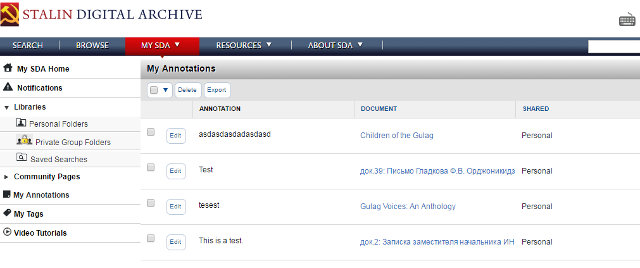
Figure 26: My Annotations page in MySDA


4.7 My Tags

Users can manage their personal, private group, and public tags via the My Tags tab, available via the MySDA left-hand navigation panel. The My Tags page displays a list of personal, private group, and public tags created by the user (Figure 27). The number in parentheses that follows each tag indicates how many times the user has applied that tag throughout the archive. Clicking on the grey arrow before a tag name will reveal the other tags with which the initial tag shares a document.

Tags

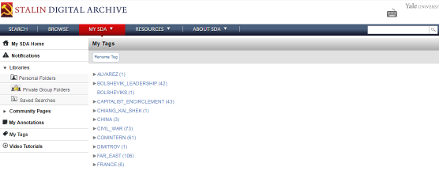
Figure 27: My Tags page in MySDA


Thank you for your interest in the Stalin Digital Archive. If you have any questions or concerns about the User Guide, the website, or anything else related to the archive, please send an email to the SDA Support Team at support@stalindigitalarchive.com. Please click here to download a PDF copy of the User Guide

  • Yale
  • Terms & Conditions
    |
  • Privacy Policy & Data Protection
    |
  • Contact
    |
  • Accesssibility
    |
  • Copyright 2018 Yale University
  • Connect with us:
  • Yale
  • Yale